Create a DIY succulent zen garden corner as a weekend project – the ideal place for chilling and relaxing for when you need it the most.
I’m excited to share my garden makeover with you, but I wanted to make sure that this one is just right! Spring has arrived here in Valencia, and what a better way to spend the Easter holidays than to check off those things that we’ve been meaning to do… well, forever!

For the last 3 years, I’ve been wondering about what to do about this corner of our garden. OK, it’s not the worst thing in the world but it’s boring and in need of a bit of TLC. We’re lucky enough to have a large garden so we wanted something that acts as a focal point at the end of the pool area.
When I pitched the idea to my husband that I want to do something about this corner, he told me that the drainage pipe had to stay. This is the outlet that we use to drain and clean the pool. Yes, it’s quite ugly but it’s not impossible to ‘hide’ it, as long as we can access it when needed.
Another thing that we have to consider is that any plants that we place in this area, have to be ‘pool friendly’. This means that they should at least be 1.5 to 2.5 metres away from the edge and not lose a lot of leaves or flowers that can go in the water! Though pools are really cool, there’s a lot of cleaning involved to keep them pristine and looking lovely.
Some of the links in this post are affiliate links. This means if you click on the link and purchase the item, I will receive an affiliate commission at no extra cost to you. All opinions remain my own.
Buddha Zen Garden Idea
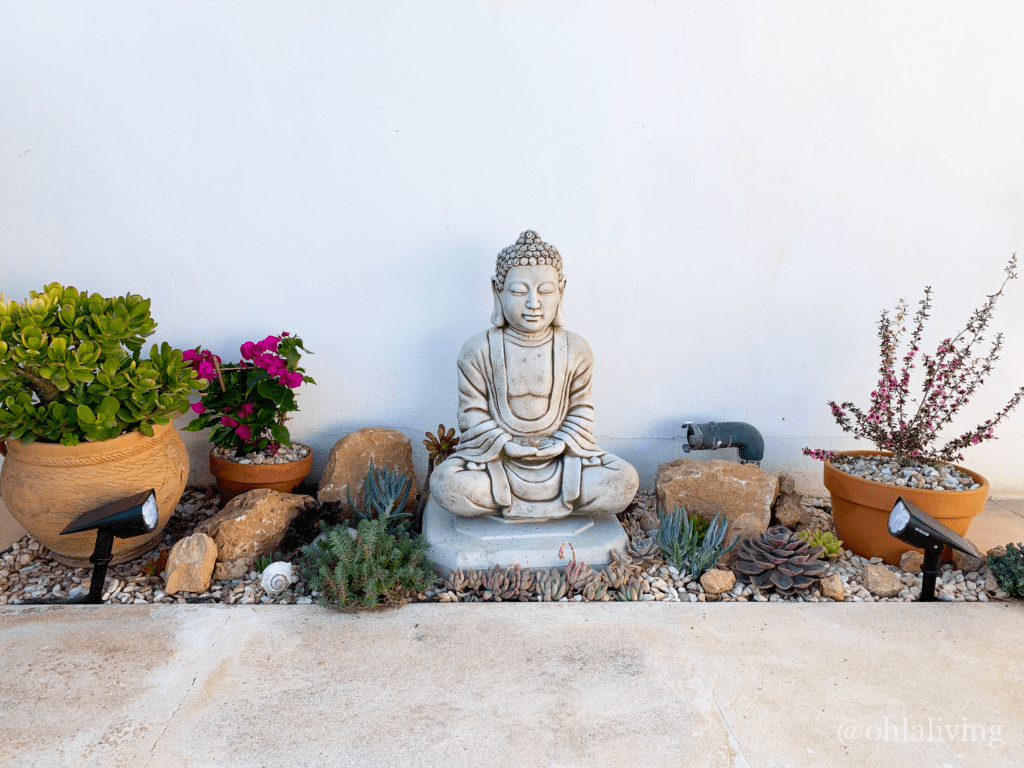
I’ve always wanted a zen type garden but wasn’t too sure how to go about it. I’ve exhausted Pinterest trying to look for ideas, and in the end, I decided to go for it! There’s no time like the present right? And to be honest, I’m not prepared to stare at this wall for another summer.
I’ve toyed with a few ideas before deciding on a zen area. I wanted something that’s low maintenance, which also incorporated my love for succulents. I also wanted a statue of some kind, and I really loved the idea of a large meditating buddha.

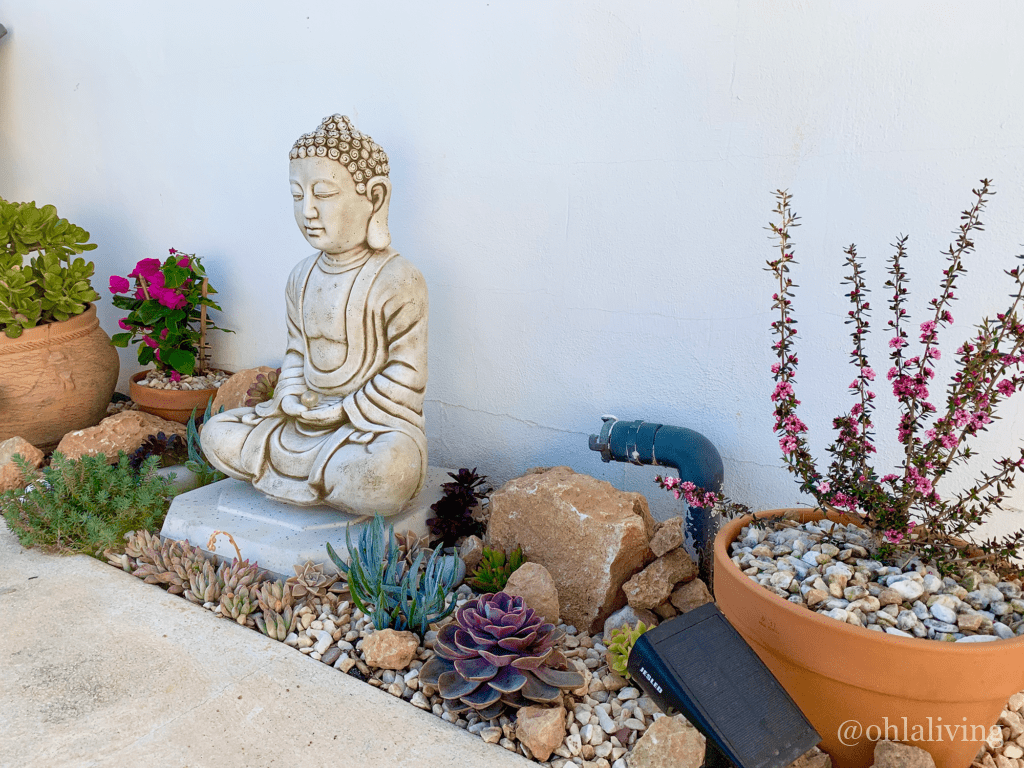

Items For To Create a DIY Succulent Zen Garden
White stones
White gravel and stones are usually the best ground cover to use for your zen garden. A traditional Japanese zen garden use fine gravel instead of sand. But in this case, I wanted to use the white pebbles that I already have.
Succulent plants
This area of my garden faces south, which means that it gets the sun all day. During the peak of summer here in Valencia, temperatures can reach up to 45°c. Any plants that I decide to place here should be hardy enough and tolerate full sun exposure.
Rocks
I wanted the area to have some depth to it. I had some rocks from our old rockery, and I used those to create a rockery area next to my Buddha.
Buddha
I got mine from the local garden centre. The Buddha is the perfect size and colour for what I had in mind. Taking it home was another story, weighing 45kg it was not easy to get it in and out of the car! If you want something similar, they also sell them on Amazon. This meditating Buddha is very similar to what I have in terms of size.
Buddha Solar lights
I chose a pair of solar-powered spotlights to position on each corner. This gives a nice glow and it frames my zen area in the evening. There’s no need for wires or electric points, just stick it on the ground, as long as it gets a lot of sun. The light is bright enough and it stays on all evening.
How I Created My Succulent Zen Garden Space
Step 1
Fortunately, I didn’t have to do much prepping on the area. The white stones needed washing, and I did this by soaking them in pavement cleaner for a few days. If you don’t have existing stones you can easily find them in your local garden centre or you can buy these decorative pebbles from Amazon.
Step 2
While I waited for the stones to clean, I removed the old weed barrier and replaced it with a new one. I used GardenMat to layer the ground. This is the best way to prevent and kill weeds and grass growing through the soil. Not only it stops unwanted growth, but it also stops burrowing creatures to access the ground below where they can eat the plant roots.
Step 3
I made a list of plants that I wanted to place in my zen area. I decided from the starts that I will be using succulents or cacti as they are hardier and doesn’t require much looking after. This area of our garden gets the sun all day, so it’s important that I use plants that can tolerate the hot summers here in Valencia.

Colours are also important to me, so I choose plants that give this area some character. For my zen garden I decided to use the following plants:
- Blue chalk sticks (Curio repens)
- Spanish stonecrop (Sedum hispanicum)
- Jellybean succulents (Sedum rubrotinctum)
- Ice plant (Malephora crocea)
- Broom tea-tree (Leptospermum scoparium)
- Slenderleaf ice plant (Mesembryanthemum nodiflorum)
- Echeveria sedoides
- Bougainvillaea
Step 4
Choosing the right Buddha for my zen garden is probably the most important thing I have to decide upon. After looking at several statues, I decided to go for a large meditating Budhha. My buddha stands at 60cm tall and made of solid concrete. I also used a base to which I had an issue finding online.
In the end, I decided that a parasol stand would do the job as it’s wide and heavy enough to hold the statue. Adding a base for the statue is a personal choice, you don’t have to, but I wanted a platform for my buddha to increase the height a little bit more.
Step 5
I placed the Buddha in the middle of the area with the weed barrier already in place. Once in position, I made some holes in the weed barrier where I wanted my plants to go. This stage can be quite tricky as I needed to dig the holes through the small opening in the barrier. I used a hand trowel to do this job, making sure the holes in the ground are deep enough for my flowers to be planted.
Step 6
Once all the plants are planted in place, I resumed placing the white stones on the ground, adding large stones to give the area a bit more depth and also to frame the buddha in place.
DIY Succulent Zen Garden At Night
So, that’s our new DIY succulent zen garden area! We are really pleased with it, and can’t wait to spend our summer days and evenings out there finally enjoying it! The boring wall has finally gone, replaced with a more pleasing view. I hope you like it too! Perhaps this makeover will inspire you to attempt your own garden transformation. What do you think? Let me know in the comments below!


