If you’ve ever fancied your own terrarium but not prepared to pay for the price, why not make your own? Not only they’re a great conversation starter, but they’re also super easy to make! On this post I’ll show you an easy step by step guide on how to make a terrarium in a jar or vase.
If you’ve followed my blog for a while, you probably know I love tinkering around in the garden, creating all sorts of projects. From DIY herb box gardens to succulent log planters, I’ve tried it all. Now, I won’t pretend to have been born with a green thumb – far from it! But after a few years of trial and error, I’m happy to report I’m getting better at this whole plant parenting thing. The number of plant casualties has dropped significantly, a welcome relief for both my wallet and my leafy companions. 🪴
A couple of weeks ago, while I was knee-deep in my annual spring cleaning frenzy, I found an old glass vase tucked away in the depths of a forgotten cupboard. Now, being a firm believer in the mantra of waste not, want not, I didn’t want to throw it away . Instead, my mind began churning with possibilities for its newfound purpose beyond merely holding flowers. That’s when it hit me – those adorable (and expensive!) open air terrariums I’d ogled at during a recent jaunt to the local garden centre!


Some of the links in this post are affiliate links. This means if you click on the link and purchase the item, I will receive an affiliate commission at no extra cost to you. All opinions remain my own
Of course, I could have opted to buy a terrarium kit, but I much prefer to make my own. So after gathering all the materials, suitable plants for terrariums, and spending a little time making it look how I want, this is what I ended up with:


And of course, with spring just around the corner this little open air terrarium is a nice little addition to add some unusual greenery for my home. So I want to share with you how I put it all together! But before we dive in, there’s a crucial decision to make: open or closed terrarium? Let’s explore the options together.
Table of Contents
Choosing the Right Plants for your terrarium
Decide on what kind of plants you want to add in your terrarium. Wide mouth glass containers are suitable for plants who prefer drier conditions. Plants that thrive in open terrariums include succulents, cacti, and air plants. While closed glass jars or jars with smaller openings are more suitable for plants that enjoy high humidity and moisture, such as ferns, mosses, and tropical plants.
I choose tropical plants for my terrarium. With plenty of succulents already in my collection, I wanted to try something different. Plus, I had the perfect spot in mind—the dining room, where the lighting tends to be on the dimmer side.
Whats the difference between an open and closed terrariums
Open terrariums
Open glass terrariums have an opening or no lid at all, allowing air to freely circulate within the container. They require less attention to humidity levels because air circulation helps prevent moisture buildup. They are suitable for plants that prefer drier conditions or are more tolerant of fluctuations in humidity.
Closed terrariums
Closed terrariums are sealed environments with a lid or covering, creating a self-contained ecosystem. They require careful monitoring of humidity levels because moisture is trapped within the container. They typically need less frequent watering as the water cycle is self-sustaining, with condensation forming and returning moisture to the soil.
Do I need special tools to make a terrarium?
While there are no specialised tools required to make a terrarium, investing in a miniature tool set designed specifically for terrarium or bonsai gardening can be advantageous. These tools are handy for maintaining your terrarium as your plants grow or for making adjustments if needed.
Creating your own terrarium is simpler than it seems. With just a few basic supplies, you can dive into the delightful world of miniature gardening.
What materials do I need to make a terrarium?

A glass container
The essential starting point for your terrarium project is a glass container. Look for a glass container with a wide opening, which will make it easier to arrange your plants and water them as needed. If you’re leaning towards a closed terrarium, you’ll want a glass container equipped with a lid, preferably one made of cork. Not only does it add a pleasing aesthetic touch, but it also helps mimic the natural habitat of your plants, creating the ideal environment for their growth and well-being.
Selection of pebbles of stones
When choosing pebbles for your terrarium, consider the size of your container and the aesthetic you want to achieve. It’s essential to use pebbles or stones that are clean, washed, and free from any harmful chemicals or residues. Here are some common types of pebbles suitable for terrariums:
Terrarium Gravel
Sold specifically for terrariums, this type of gravel is clean, sterilised, and suitable for creating layers in terrariums.
River Rocks
Smooth, rounded stones collected from riverbeds are popular for terrariums due to their natural appearance and variety of colours.
Polished Pebbles
These are small stones that have been polished to achieve a smooth and shiny surface. They come in various colours and can add a decorative touch to your terrarium.
Lava Rocks
Porous and lightweight, lava rocks provide good drainage and help aerate the soil in terrariums. They also come in different sizes and colours.
Marble Chips
These small, polished stones are available in a range of colours and add a touch of elegance to terrarium designs.
Aquarium Gravel
Designed specifically for aquariums, aquarium gravel is safe for use in terrariums and comes in a variety of colours and sizes.
Activated charcoal
Adding a layer of activated charcoal is important when creating your terrarium, it serves as a multifunctional barrier against mould and staleness. It also acts as a natural absorbent, soaking up excess moisture and preventing the growth of mould and bacteria. This is especially important in closed terrariums, where stagnant air can lead to humidity accumulation, creating a breeding ground for microbial growth.
Soil
When choosing soil for terrariums it’s essential to choose a well-draining, nutrient-rich substrate that promotes plant growth while maintaining proper moisture levels. I used normal potting soil, but you can also use cactus/succulent soil mix, terrarium soil, peat moss and sand mix.
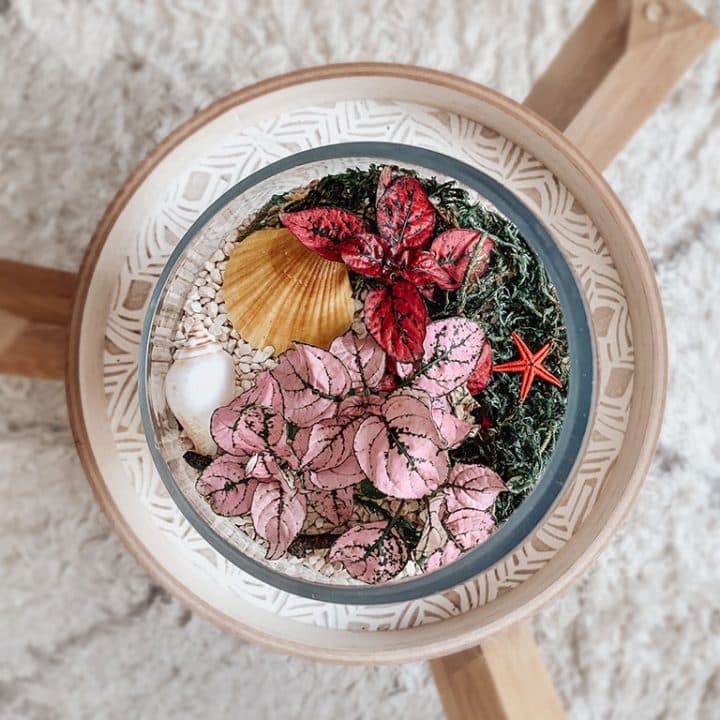
Decorations (optional)
If you want to add your personal style you can decorate your terrarium with embellishments. You can add whimsical figurines, natural elements like driftwood or shells, or colourful accents such as decorative stones or sand. Consider adding personalised touches or colour coordinate to match your homes aesthetics.
5 Easy Steps On How to Make a Terrarium in a Jar
Step 1 – Add drainage
After choosing your container, the next step is to ensure proper drainage by adding a layer of sand. Shake the jar to even out the sand. Then place the large pebbles on top.
Step 2 – Add the charcoal
Once you have laid out the drainage, add about 1/2 inch of horticultural charcoal. This absorbs toxins and keeps your terrarium fresh and mould-free.
Step 3 – Add the soil
Now it’s time to add the soil. I used a potting mix that I had available. Adding 3 inches of soil worked well for the glass container I purchased. Now it’s time to add the plants!!!
Step 4 – Add your plants
Gently remove the plants from their pots, being careful not to damage the roots. Dig small holes in the soil of the terrarium where you want to place each plant. Add more soil if needed to ensure the roots of your plants are fully covered.
Step 5 – Decorate
To complete the terrarium, I added larger stones and reindeer moss. While these elements are optional and mainly serve as decor, they can also influence plant growth depending on their placement. Experimenting with the arrangement of rocks can create unique microclimates within the terrarium, affecting where plants thrive or struggle. Enjoy your new DIY terrarium!
Step by Step Guide With Images


Taking care of your terrarium
How often should I water my terrarium?
Even though a terrarium doesn’t take too much care, it’s important to monitor the moisture level of the soil, and only water when it feels dry to the touch. After planting your terrarium add a little bit of water or get a spray and spay around the soil until it feels damp.
How much light does a terrarium need?
Place the terrarium in an area with indirect or filtered light, rotating it periodically for balanced exposure. Avoid placing your terrarium in direct sunlight, as it can cause the glass to heat up excessively and may scorch the plants. While closed terrariums create their own humid environment, open terrariums may benefit from a slightly more humid location. Avoid placing your terrarium near sources of dry air, such as heaters or air conditioners.
Do I need to fertilise my terrarium?
If you’ve picked plants that thrive in low-nutrient environments and used nutrient-rich soil, you probably won’t need to fertilise right away. But as your plants grow, they’ll use up the available nutrients, and you might start to see signs like pale leaves or slow growth. That’s your cue to consider fertilising. Just go for a balanced liquid fertiliser made for indoor plants and dilute it according to the instructions. And remember, less is more—over fertilising can do more harm than good. Keep an eye on your plants’ health and growth, and fertilise only when needed.
How do I maintain my terrarium?
Keep the terrarium tidy by pruning any overgrown or dead plant material and removing fallen leaves or debris. For closed terrariums, open the lid occasionally to allow fresh air circulation. While fertilisation is usually unnecessary, if signs of nutrient deficiency appear, use a diluted liquid fertiliser sparingly. Lastly, watch for pests or diseases and address any issues promptly to preserve the terrarium’s health.
Full Instructions on How to Make a Terrarium in a Jar or Vase
How To Make A Terrarium In A Jar
If you’ve ever fancied your own terrarium but not prepared to pay for the price, why not make your own? Not only they’re a great conversation starter, but they’re also super easy to make!
Materials
- Large glass jar or vase
- Potting soil
- Fine sand
- Horticultural charcoal
- Large stones
- Moss
- Plants
- Decoration
Tools
- Small shovel
- Tweezers
Instructions
- Select a clean and dry glass container suitable for your terrarium
- Pour a layer of sand into the bottom of your container, adjusting the thickness to your preference. Level the sand by gently shaking the container.
- Arrange large stones on top of the sand, using a small stick or shovel to even them out.
- Scatter small stones on top of the large stones, adjusting the thickness based on your preference.
- Sprinkle a layer of charcoal evenly over the stones to help maintain freshness in your terrarium.
- Pour a thicker layer of potting soil over the charcoal, providing ample space for your plants to grow.
- Arrange your chosen plants in the soil, positioning them according to your desired arrangement.
- Add a layer of decorative pebbles or other embellishments to complete the look of your terrarium.
- Place your finished terrarium in a suitable location and admire your handiwork!
Recommended Products
As an Amazon Associate and member of other affiliate programs, I earn from qualifying purchases.
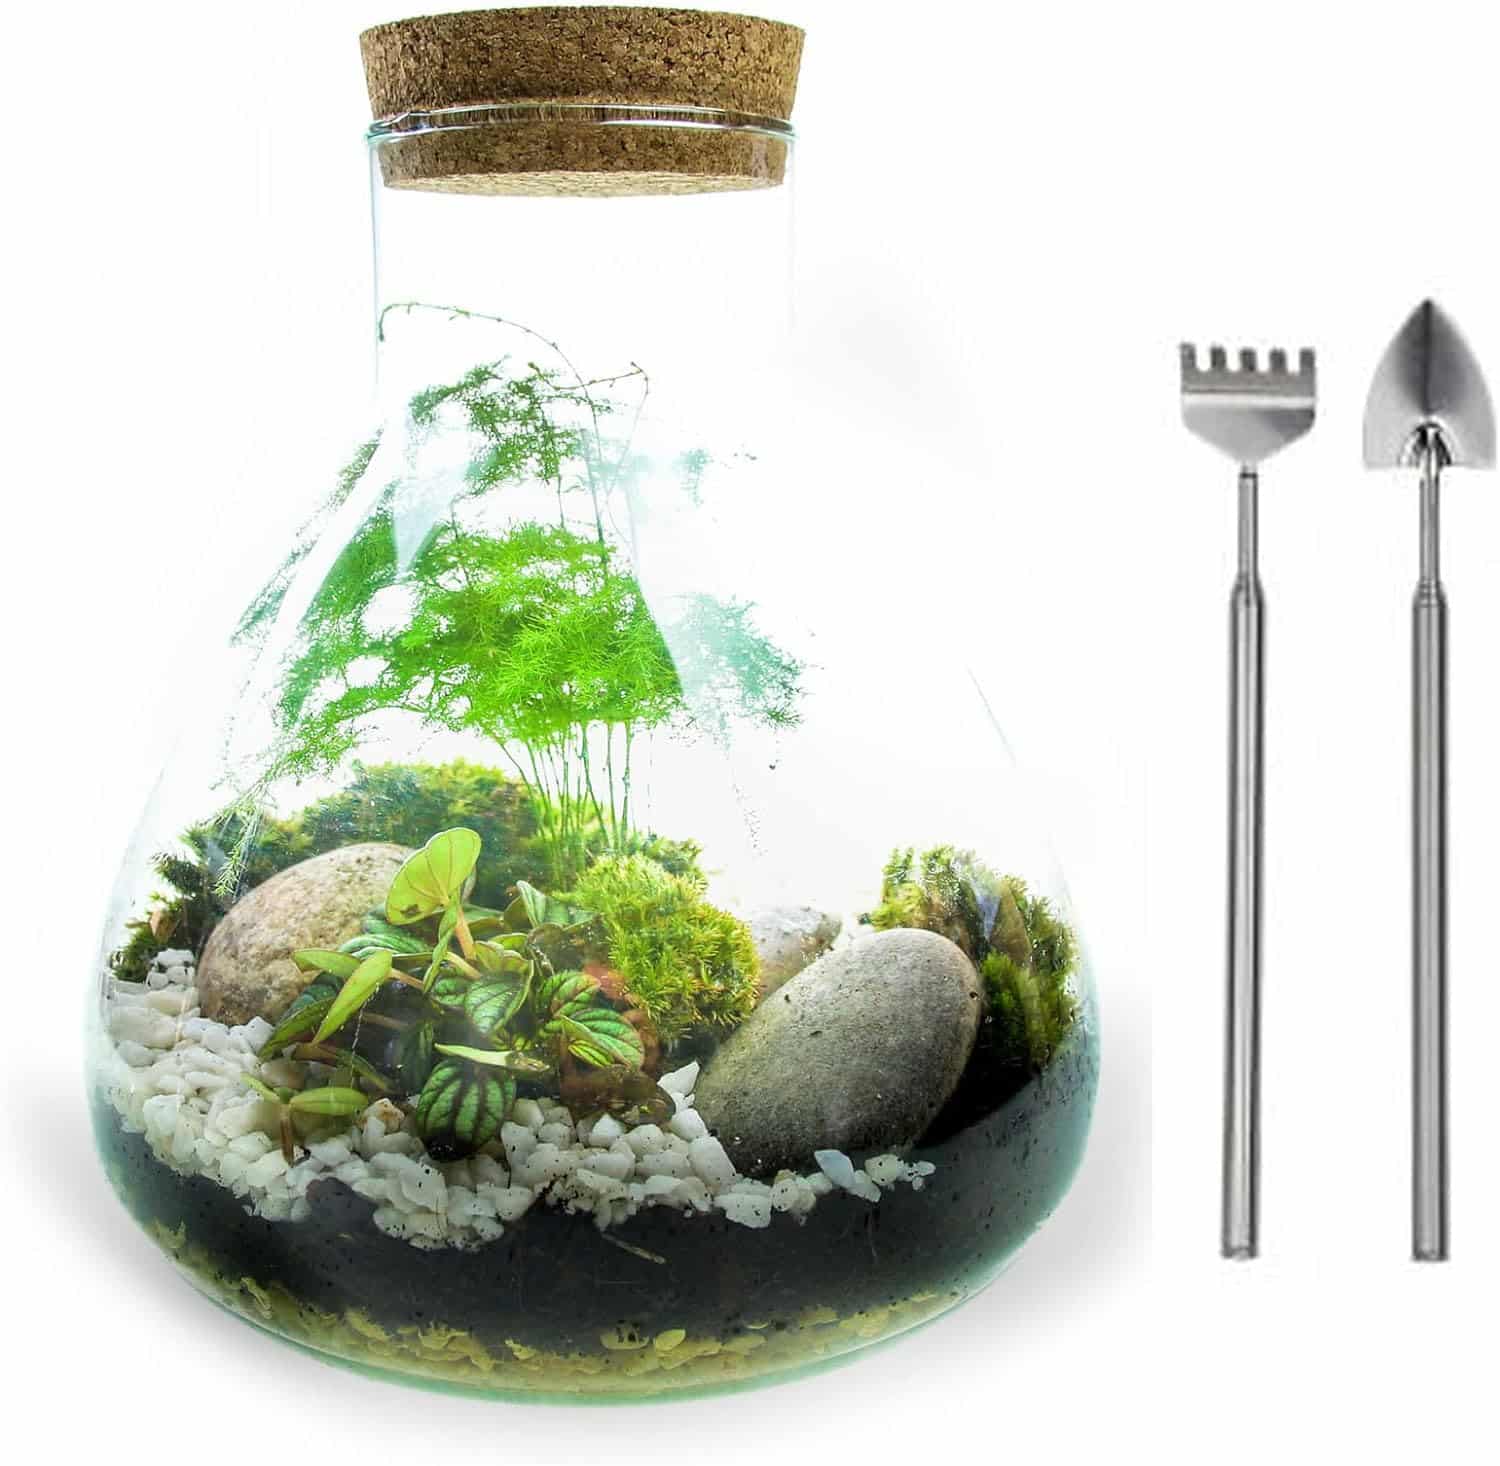


My DIY Terrarium

It’s truly amazing what a bit of imagination, a glass vase, and some plants can achieve. Would you believe that the smallest terrarium at my local garden centre costs €50? Meanwhile, my little project only set me back about €10! I already had soil, pebbles, and moss at home. I only needed to buy the plants, priced at €2.99 each, and activated charcoal, which cost €5.00 at the garden centre. As for the vase? It had been sitting neglected at the back of my cupboard for years, finally finding its purpose in this easy DIY project. 💚
Feeling inspired by this project? Why not try making your own terrarium? It’s a wonderful way to add a unique touch to your home or create as a handmade gift for someone special. Let me know your thoughts on the comments below!
If you like this project, you can also check out some of the other things I have created:
Craft Your Own Fabric Cactus in a Stylish Terracotta Pot: DIY Guide
How to Make a DIY Herb Box Garden – A Step by Step Guide
Elevate Your Space with a Blissful Succulent Zen Garden: DIY Weekend Project
Ultimate Guide: How to Preserve Fresh Eucalyptus Stems with Glycerine
DIY Rustic Terracotta Pots: Transform with Chalk Paint for a Delightful Garden
Create Your Own Andalusian Wall Planters | DIY


1 comment